

Table of Contents:
- Why Proper Installation Matters
- Choosing the Right Material
- The Role of Underlayment
- Step-by-Step Gym Flooring Installation
- Cleaning Routines for Rubber Flooring
- Maintaining High-End Fitness Floors
- Choosing the Right Floor Cleaner
- Gym Flooring FAQ: Installation, Maintenance, and Cleaning
- Start Strong, Stay Durable: Your Gym Floor Matters
Why Proper Installation Matters
When it comes to building the right gym — whether at home or in a high-traffic commercial fitness space — a poorly chosen or improperly installed floor can undermine everything. Gym flooring isn't just about aesthetics; it's the cornerstone of functionality, safety, and longevity in your workout environment.
Here's where most people make a critical mistake: they assume it's all about picking the right material and stopping there. Even the highest-end gym flooring can fail if you skip the details — underlayment, proper installation techniques, or regular upkeep. Those oversights lead to premature wear, moisture damage, or hazardous conditions.
This guide covers every essential step from material selection through installation and long-term maintenance, so your floors perform as intended for years to come.
Choosing the Right Material
Selecting the right flooring material is the critical first step. It impacts durability, functionality, and the look of your space.
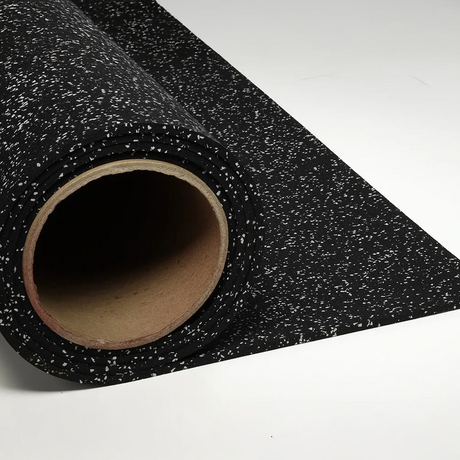
Rubber flooring is the go-to choice for most gyms. It's durable, shock-absorbent, and handles even the most intense workouts. Plus, it's easy to clean and maintain, making it ideal for both home and commercial use. One detail most buyers overlook: thickness matters more than most people realize. A 6mm rubber roll is fine for yoga or stretching zones, but free weight areas require a minimum of 8mm — and dedicated deadlift platforms should go thicker still. For a full breakdown of rubber flooring advantages, see our guide to gym mats, tiles, and rubber flooring types. If you want to evaluate material quality before committing to a full order, you can also request a free ECORE flooring sample to feel the difference in density and finish firsthand.
Foam tiles are a softer option — good for low-impact activities like yoga or stretching, but they lack the resilience needed for heavy equipment areas. Vinyl flooring offers a sleek, moisture-resistant surface that stands up well to sweat and spills. Turf is the go-to for functional training and sports-specific gyms, offering a natural aesthetic with excellent traction.
When choosing between rubber tiles and rubber rolls, room shape is a practical factor worth considering. Irregularly shaped rooms — those with columns, alcoves, or non-standard angles — tend to waste less material with tiles, since you can cut individual pieces to fit. Rectangular rooms, on the other hand, are more efficient with rolled flooring, which covers large areas with fewer seams. For high-traffic rectangular weight rooms, the ECORE Baller Motivate Laminate Roll (7mm Class 1) is a well-suited option for general free weight and cardio areas, while facilities with heavier drop loads may want to step up to the ECORE Baller Rally Laminate Roll (14mm Class 2) for added protection and acoustic performance.
Pro Tip: Before picking a material, evaluate your workout habits. Lifting heavy weights? Focus on durability and thickness. Running group classes? Prioritize ease of maintenance. Your exercise types, budget, and subfloor condition should all guide the decision. And when placing your order, always add 2–3% to your room's square footage to account for waste from edge cuts and fitting — ordering exactly to room dimensions is one of the most common and costly mistakes buyers make.
The Role of Underlayment
Your workout floor doesn't start with the visible layer. Underlayment is the unsung hero of gym flooring, providing shock absorption, soundproofing, and moisture resistance that protect both your floor and your joints.
For versatile performance, rubber underlayment is excellent at dampening noise and supporting heavy equipment. Prefer something eco-friendly? Cork underlayment provides thermal insulation and hypoallergenic properties, making it a solid choice for home gyms. For fitness class areas, foam underlayment adds the cushioning you need.
One consideration that often catches facility managers off guard: if your gym is located above the ground floor of a multi-story building, acoustic underlayment under rubber flooring may be required by local building code — not just recommended. Factor this into your budget and specification from the start, not as an afterthought. Always consult the manufacturer's instructions when installing underlayment, since different flooring types require specific base materials to maximize longevity and performance. Skipping this layer can lead to moisture buildup or reduced shock absorption, causing premature wear. For more on how shock absorption works in practice, read our article on shock-absorbing gym floors.
Step-by-Step Gym Flooring Installation
Installing gym flooring isn't complicated, but precision matters. Here's a step-by-step process:
- Prepare Your Space: Level and clean your subfloor, removing all dirt and debris. Allow your gym flooring and underlayment materials to acclimate to the room's temperature and humidity before installation.
- Lay the Underlayment: Whether it's rolled rubber or foam tiles, ensure proper alignment and eliminate gaps for a seamless finish. This layer is critical for shock absorption and moisture protection.
-
Install the Flooring Material:
- For interlocking tiles, start in one corner and work outward gradually.
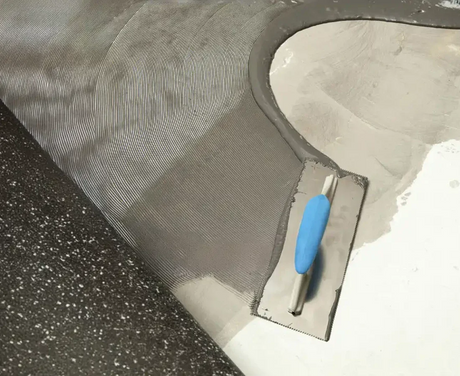
- For rolled flooring, unroll the material and secure it with adhesive if required. Allow it to settle before trimming to eliminate curling edges.
- Finishing Touches: Trim edges where necessary and secure flooring at high-traffic areas. Reinforce with adhesive or clips in zones exposed to heavy weights or frequent equipment movement.
- Cure and Test: Allow proper curing time for adhesives to set before putting the floor under full load.
Common Mistakes to Avoid: Uneven subfloors and missing moisture barriers are the two most frequent installation errors. A third that's easily overlooked: ordering material measured exactly to your room's square footage without any buffer. Cuts and edge fitting will consume an additional 2–3% of material, and running short mid-installation means delays and potential dye-lot mismatches if you reorder. Address all of these before laying any flooring to prevent warped tiles, peeling edges, or slippery surfaces down the road. If you're evaluating premium commercial options for your install, our comparison of ECORE vs. Regupol vs. Mondo rubber gym flooring breaks down which brands perform best for specific facility types.
Cleaning Routines for Rubber Flooring
Clean floors aren't just about appearances — maintenance directly affects the lifespan of your flooring and equipment.
- Daily Cleaning: Sweep or vacuum to remove loose debris like dust and dirt. Then damp-mop with a pH-neutral cleaner. Avoid harsh chemicals that could damage the surface.
- Deep Cleaning: Weekly or bi-weekly scrubbing with a specialized floor cleaner handles what daily mopping misses. Use soft-bristled brushes (manual or machine) to clean the floor's grooves without damaging the material.
Pro Tip: Spot-clean spills immediately to prevent staining, and always test cleaning solutions in a discreet area first. Rubber flooring doesn't tolerate harsh acids well. If your facility uses vulcanized rubber flooring — which offers stronger molecular bonds and longer lifespan than standard recycled rubber — also plan for adequate ventilation during the first two weeks after installation, as the initial off-gassing smell is noticeable but dissipates fully with airflow.
Maintaining High-End Fitness Floors
High-investment fitness floors demand consistent care. Here's a maintenance checklist that keeps your flooring in top condition:
- Inspect floors regularly for cracks, dents, or gaps. Address even minor wear before it spreads.
- Rotate gym equipment periodically to prevent concentrated pressure points from permanently compressing the rubber.
- Repair damaged areas promptly using professional-grade adhesives or replacement tiles. Proactive repairs prevent safety hazards and avoid further degradation.
For facilities that also use rubber flooring in non-gym applications — barn stalls, equestrian areas, or outdoor utility spaces — the maintenance principles are similar, though the specific load and environmental demands differ. Our rubber pavers for horse barns guide covers those use cases in detail if relevant to your facility. Likewise, if you're working with thicker paver-style rubber tiles for heavy drop zones, our 1-inch gym floor pavers guide covers thickness selection and installation specifics for that format.
Choosing the Right Floor Cleaner
Not all cleaners are appropriate for gym floors. The wrong product can discolor or degrade your flooring over time.
- Use pH-neutral cleaners specifically formulated for fitness flooring.
- Choose biodegradable, eco-friendly formulations when possible — they're safer for both the environment and your facility users.
- Follow any specific recommendations from your flooring manufacturer.
Products like ECORE Athletic's purpose-built floor cleaners are designed specifically for rubber gym surfaces, ensuring effective cleaning without surface damage.
Gym Flooring FAQ: Installation, Maintenance, and Cleaning
1. What is the best material for gym flooring?
Rubber flooring is the best material for most gyms due to its durability, shock absorption, and ease of maintenance. It handles heavy equipment and high-impact workouts well. Foam tiles work for low-impact activities like yoga, while vinyl is moisture-resistant and easy to clean. Turf is best for functional training.
2. How do I choose the right underlayment for gym flooring?
Choose underlayment based on your flooring type and gym needs. Rubber underlayment is versatile, offering soundproofing and shock absorption. Cork provides thermal insulation and is eco-friendly. Foam underlayment is best for cushioning low-impact activities. Always follow the flooring manufacturer's recommendations for compatibility. If your gym is on an upper floor, check local building codes — acoustic underlayment may be required, not just recommended.
3. What is the step-by-step process for installing gym flooring?
- Step 1: Clean and level the subfloor.
- Step 2: Install underlayment for shock absorption and moisture protection.
- Step 3: Lay the flooring material (interlocking tiles or rolled rubber).
- Step 4: Trim edges and secure high-traffic areas.
- Step 5: Allow proper curing time before use.
4. What are the most common gym flooring installation mistakes?
Common mistakes include not leveling the subfloor, skipping moisture barriers, leaving gaps between tiles, and using incorrect adhesives. A frequently overlooked error is ordering material based on exact room dimensions without adding 2–3% for waste from edge cuts and fitting — running short mid-installation can cause costly delays. Address all of these before installation to ensure a long-lasting, safe gym floor.
5. How do I clean and maintain rubber gym flooring?
For daily cleaning, sweep or vacuum debris and damp mop with a pH-neutral cleaner. For deep cleaning, use a specialized rubber floor cleaner and scrub with a soft-bristled brush or machine. Avoid harsh chemicals to protect the surface. Spot-clean spills immediately and always test new cleaning solutions in a hidden area before full application.
6. How can I preserve high-end gym floors over time?
Inspect flooring regularly for wear or damage, rotate gym equipment to distribute pressure evenly, and repair damage promptly. Use proper cleaning products and maintain a consistent schedule to maximize floor lifespan. For premium rubber products, ensure good ventilation during the first two weeks after installation to allow initial off-gassing to dissipate.
7. Is underlayment necessary for gym flooring?
Yes. Underlayment provides extra shock absorption, reduces noise, and protects against moisture damage. It's particularly important for heavy equipment areas and for extending the longevity of your floor investment. In multi-story buildings, acoustic underlayment is often required by local building code — verify requirements before finalizing your specification.
8. How do I select the right cleaner for gym flooring?
Choose a pH-neutral cleaner designed for your flooring type. For rubber surfaces, avoid acids and opt for eco-friendly, biodegradable options. Always check the manufacturer's recommendations to avoid surface damage.
Start Strong, Stay Durable: Your Gym Floor Matters
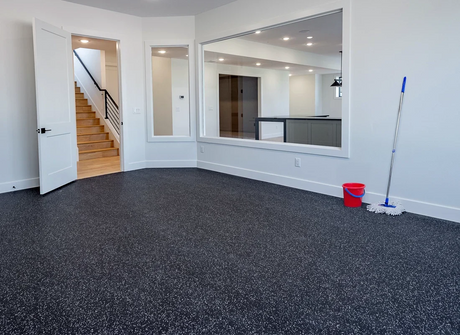
Your gym flooring is the foundation of safety, performance, and longevity in your fitness space. Whether it's choosing durable rubber, installing proper underlayment, or investing in consistent maintenance, every step adds value to your workouts and protects your investment for years to come.
For a broader comparison of flooring types and costs, check out our guide to gym flooring options for home or commercial use.
At Blue Sky Fit Supply, we carry everything you need to build the right foundation — from rubber tiles and rolled rubber to purpose-built maintenance products. Not sure where to start? Request a free ECORE flooring sample to evaluate quality before you commit, or browse our full flooring selection and reach out to our team for expert installation guidance.